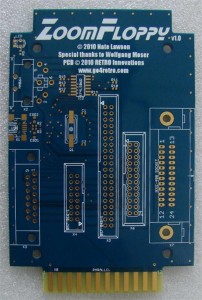
PCBs for ZoomFloppy are finished and the first 2 are enroute to the US for manual assembly and testing. Those following the blog for a while or having chatted with me at shows know the sequence for a new product:
- Initial prototyping
- Unit and system testing
- Schematic capture
- PCB CAD design
- PCB manufacturing
- Limited run hand assembly
- Final testing
- Automated Assembly
Key commitment points include step step 5 and step 8. Before step 5, little expense is involved, and truly, many projects cease before that step. Step #5 has become much more economical, so much so that initial production board runs approximate the cost for limited quantity prototype manufacturing. Thus, I don’t often run a true prototype phase. At worst, the design has an issue and I need to run another batch of boards, which costs no more than a prototype run + production PCB run. At best, the first revision works fine, and the money saved can be used elsewhere.
Step #8 is a larger commitment. Whereas a board run of 100 boards might cost a couple hundred dollars, parts acquisition alone for step #8 can easily cost 1 to 2 thousand, more if the design is a higher end product. Thus, it makes sense to, in the absence of a prototype PCB phase, hand assemble a few production boards to check final placement, fit, and function.
One the design passes testing, it becomes a waiting game for final assembled boards to arrive for sales. As in all things, there are 3 criteria: speed, quality, and price. You can select 2 of the 3 for your project. I select quality and price, so I typically wait a bit longer for assembly. In perspective, some assembly houses can do 100 units in 5-10 days, while I typically figure 15-20 days.
Still, things should progress smoothly and quickly once the final testing is done.